Appearance
SSL certificate deployment & renewal
WARNING
This document describes deploying a commercial SSL certificate. These steps are not necessary for free Let's Encrypt certificates.
Phase 1: Preparation
Generate the CSR via Laravel Forge
(Required: Server must be operational, user must have Site access on Forge.)
- Navigate to the site: Log into Laravel Forge and select the specific site/server where the SSL certificate will be installed.
- Access domains: Navigate to the Domains section for that site.
- Initiate CSR: Click the option to Add Certificate -> Certificate Signing Request
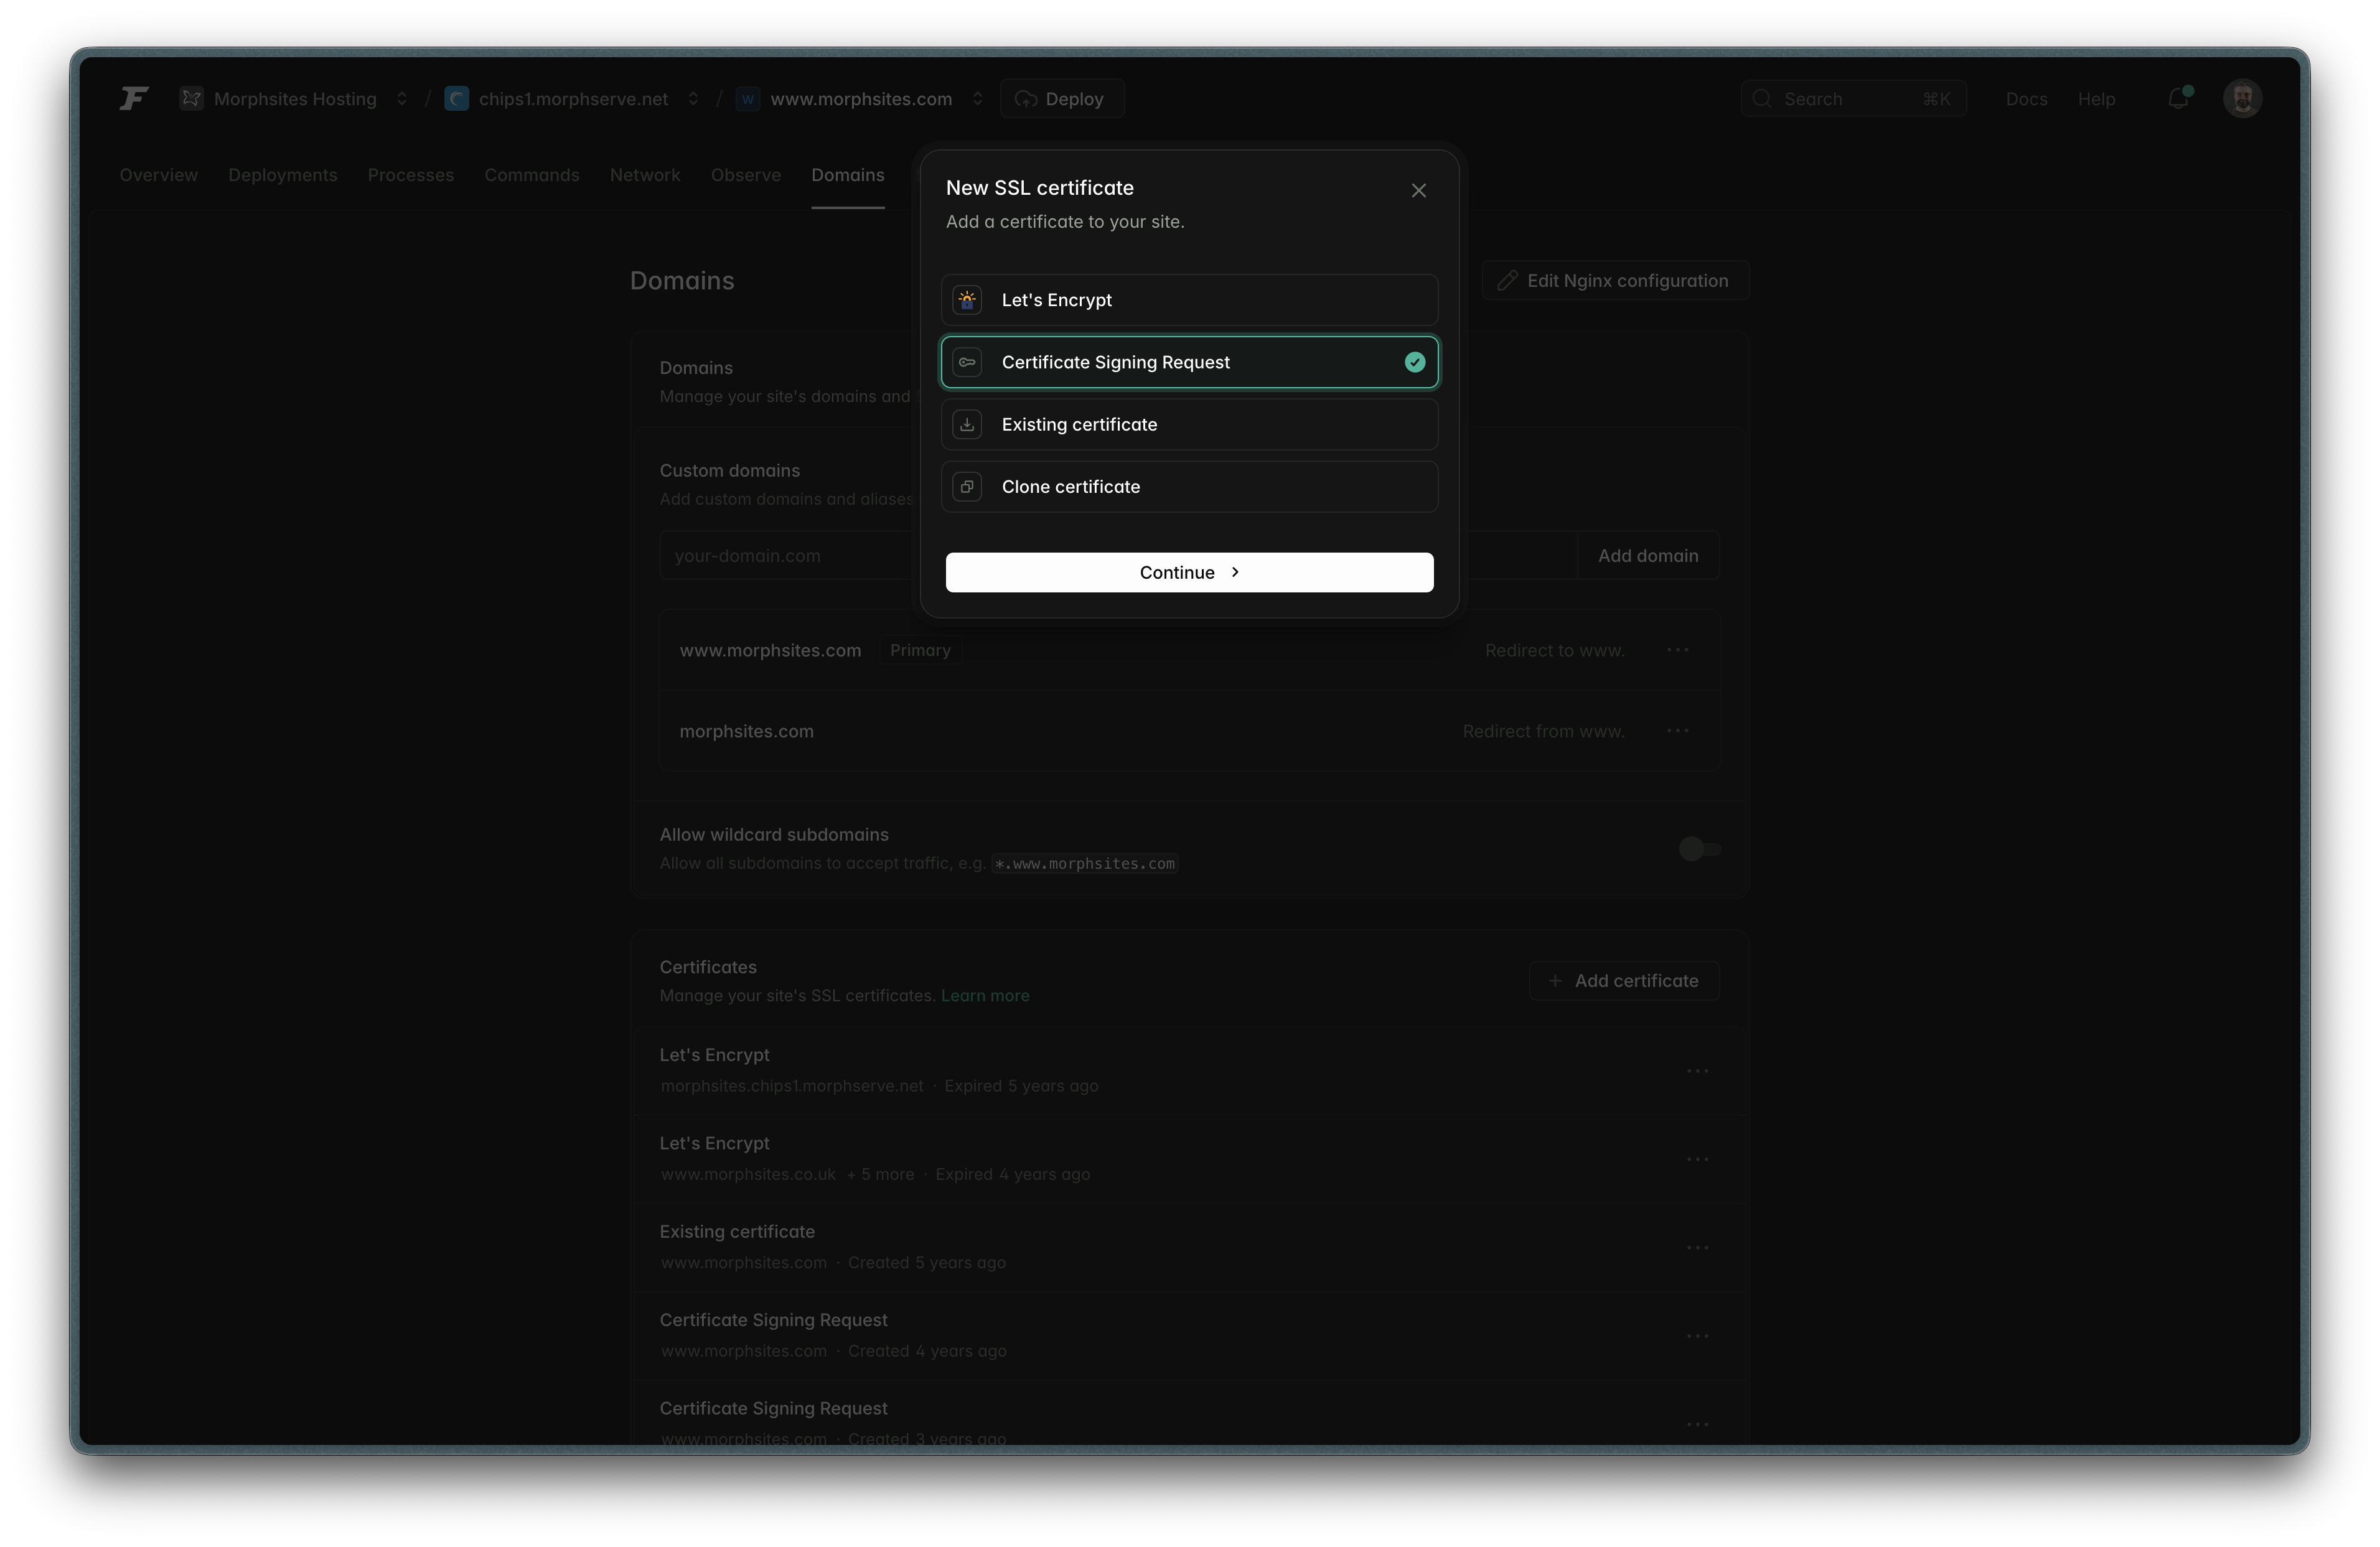
- Input details: Fill in the details required for CSR generation. These can usually be obtained from the site privacy policy.
- Domain: Usually naked domain
- Subject Alternative Names (SANs): Usually www. domain
- Country
- State: Or county in UK
- City: Or town
- Organization: Company trading name
- Department: IT in all cases
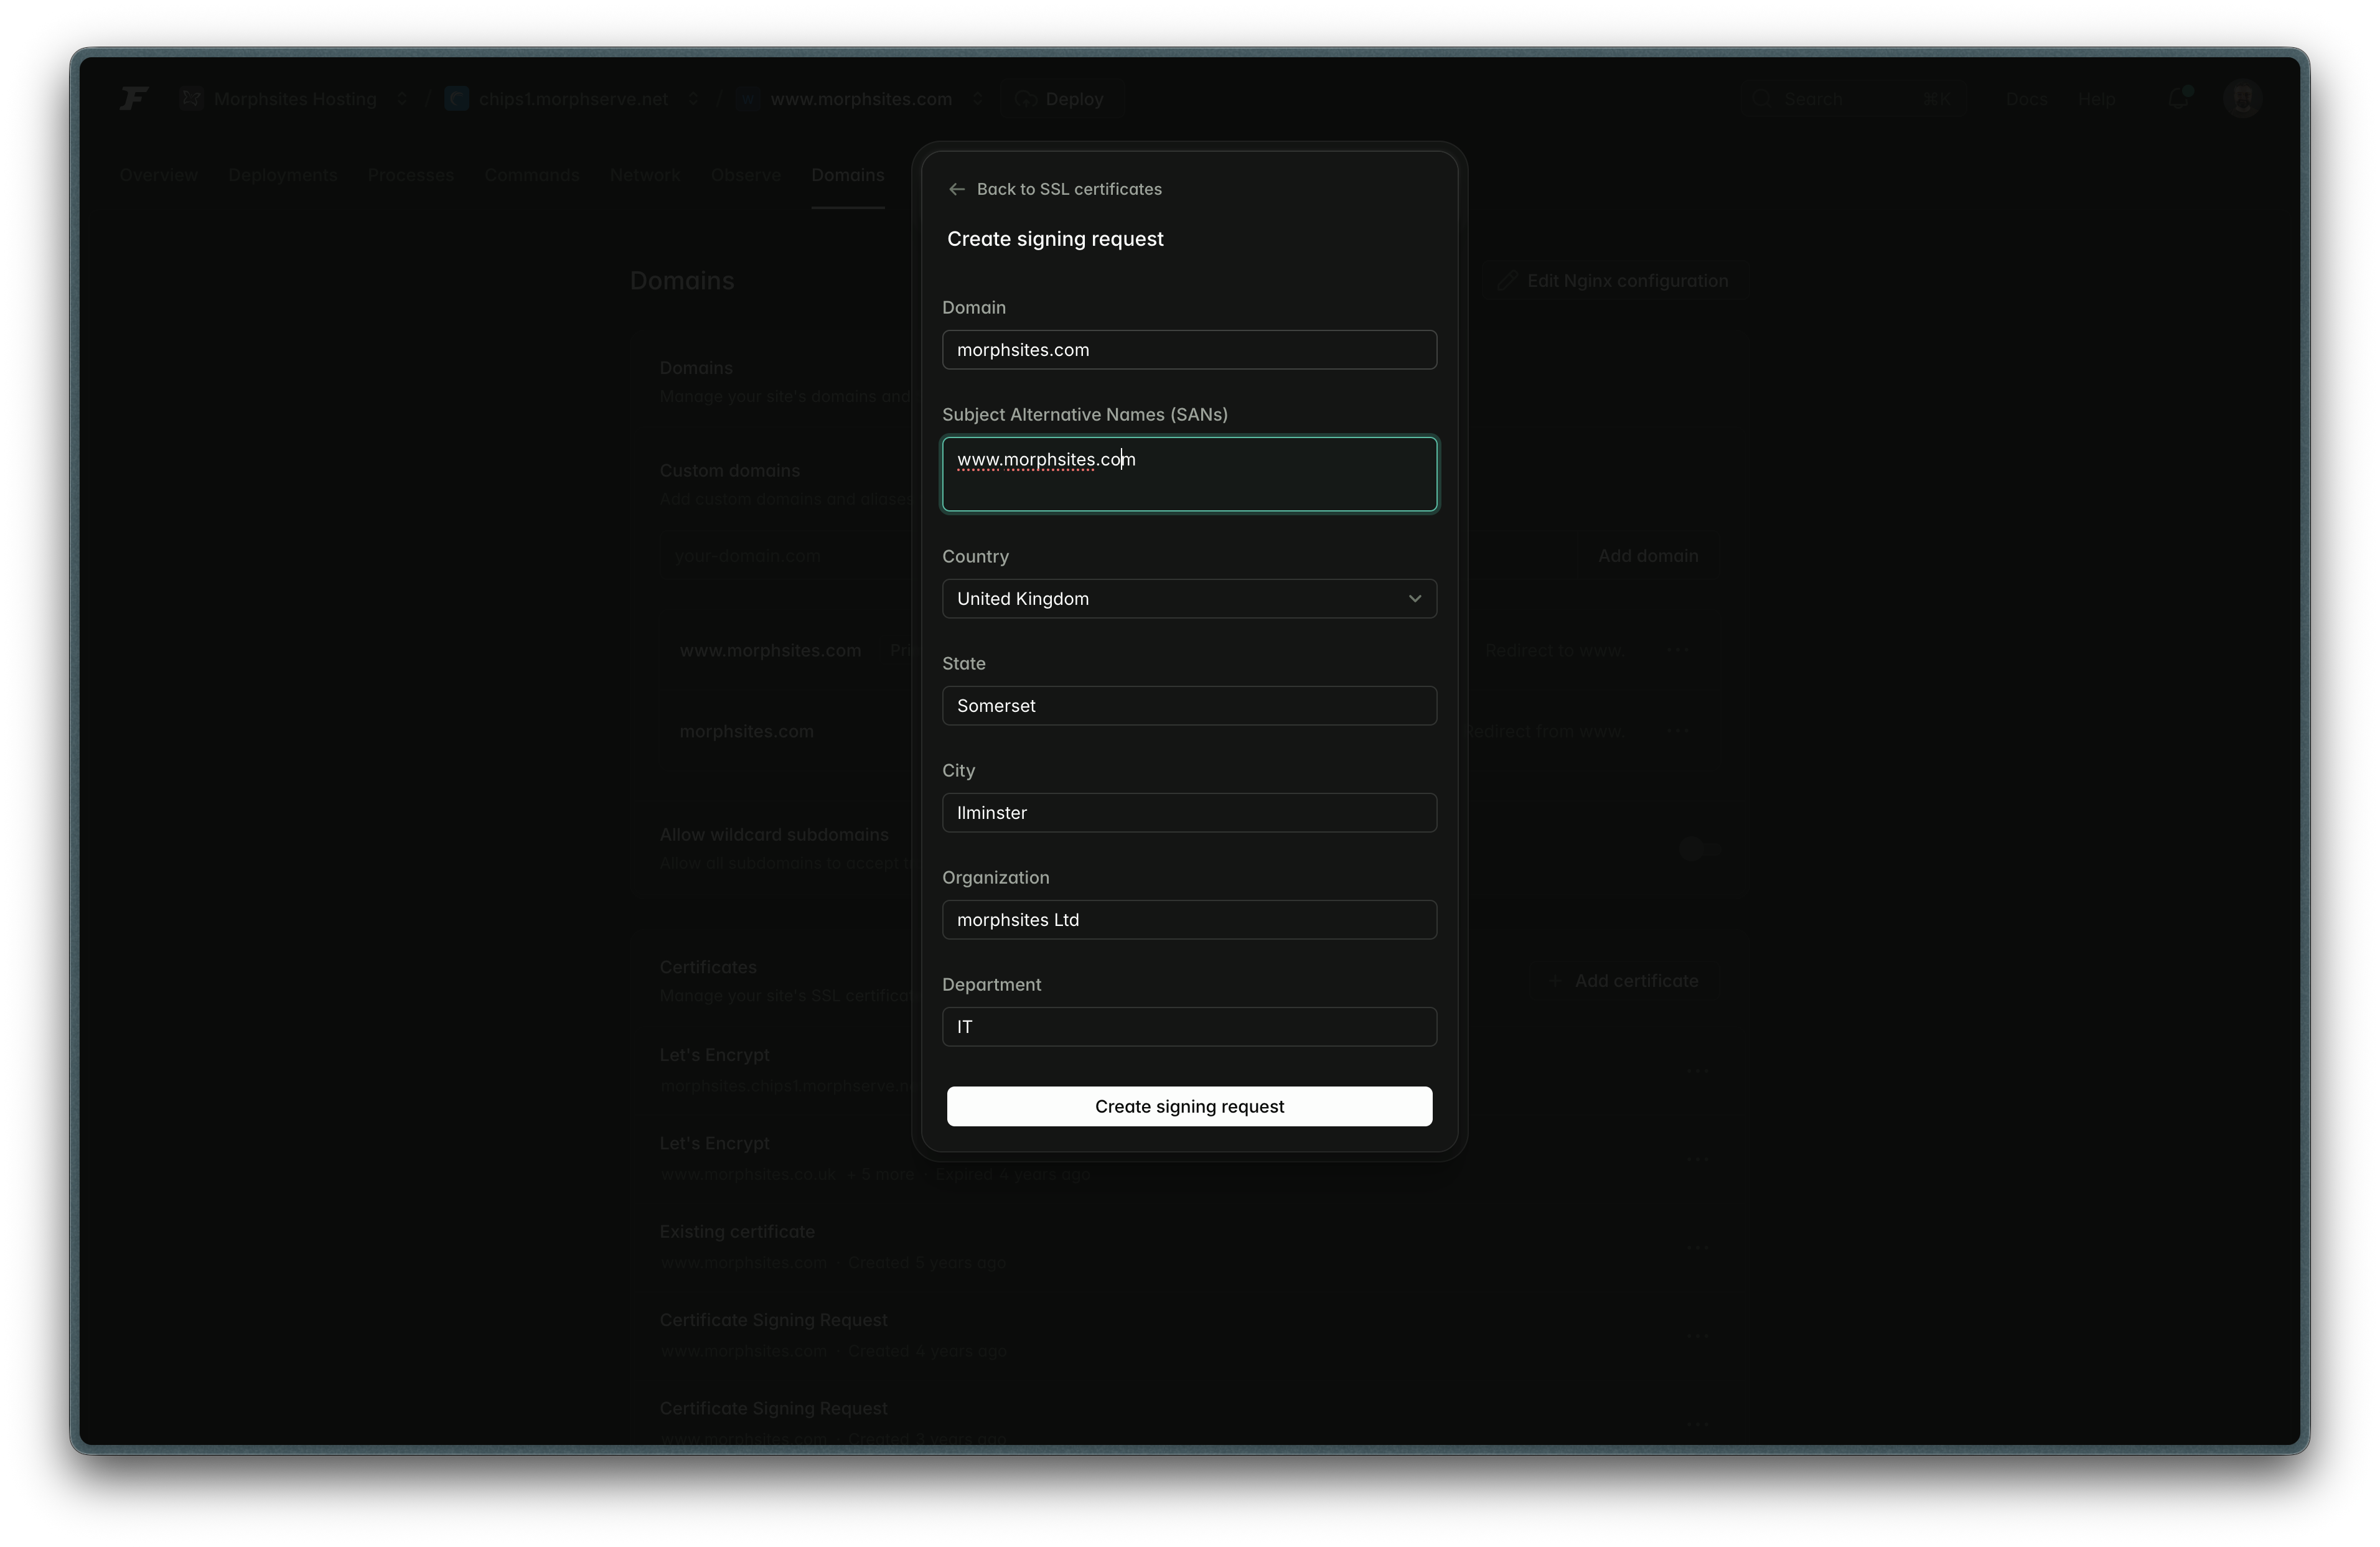
- Finalize and generate: Execute the CSR creation.
- Copy CSR: Copy for usage in DigiCert
Generate a CSR via command line (CentOS instances)
Understanding this process process is essential for advanced troubleshooting, even if you use a platform like Forge.
Remember the flow: You first generate the Private Key, and then you use that Key to create the CSR.
Generate the Private Key & CSR: This single command does the heavy lifting. Replace yourdomain.com and admin with your actual details.
bashopenssl req -new -newkey rsa:2048 -nodes -keyout /var/www/certificates/yourdomain.key.new -out /var/www/certificates/yourdomain.csrInput requested details:
- Domain: Usually naked domain
- Subject Alternative Names (SANs): Usually www. domain
- Country
- State: Or county in UK
- City: Or town
- Organization: Company trading name
- Department: IT in all cases
Copy CSR: Copy for usage in DigiCert
Phase 2: Validation & ordering (the DigiCert handoff)
The steps for requesting certificates through DigiCert can be found here:
The reissuing (renewal process is almost identical except for where navigate to initially i.e. https://www.digicert.com/secure/orders/expiring/. Steps can be found here:
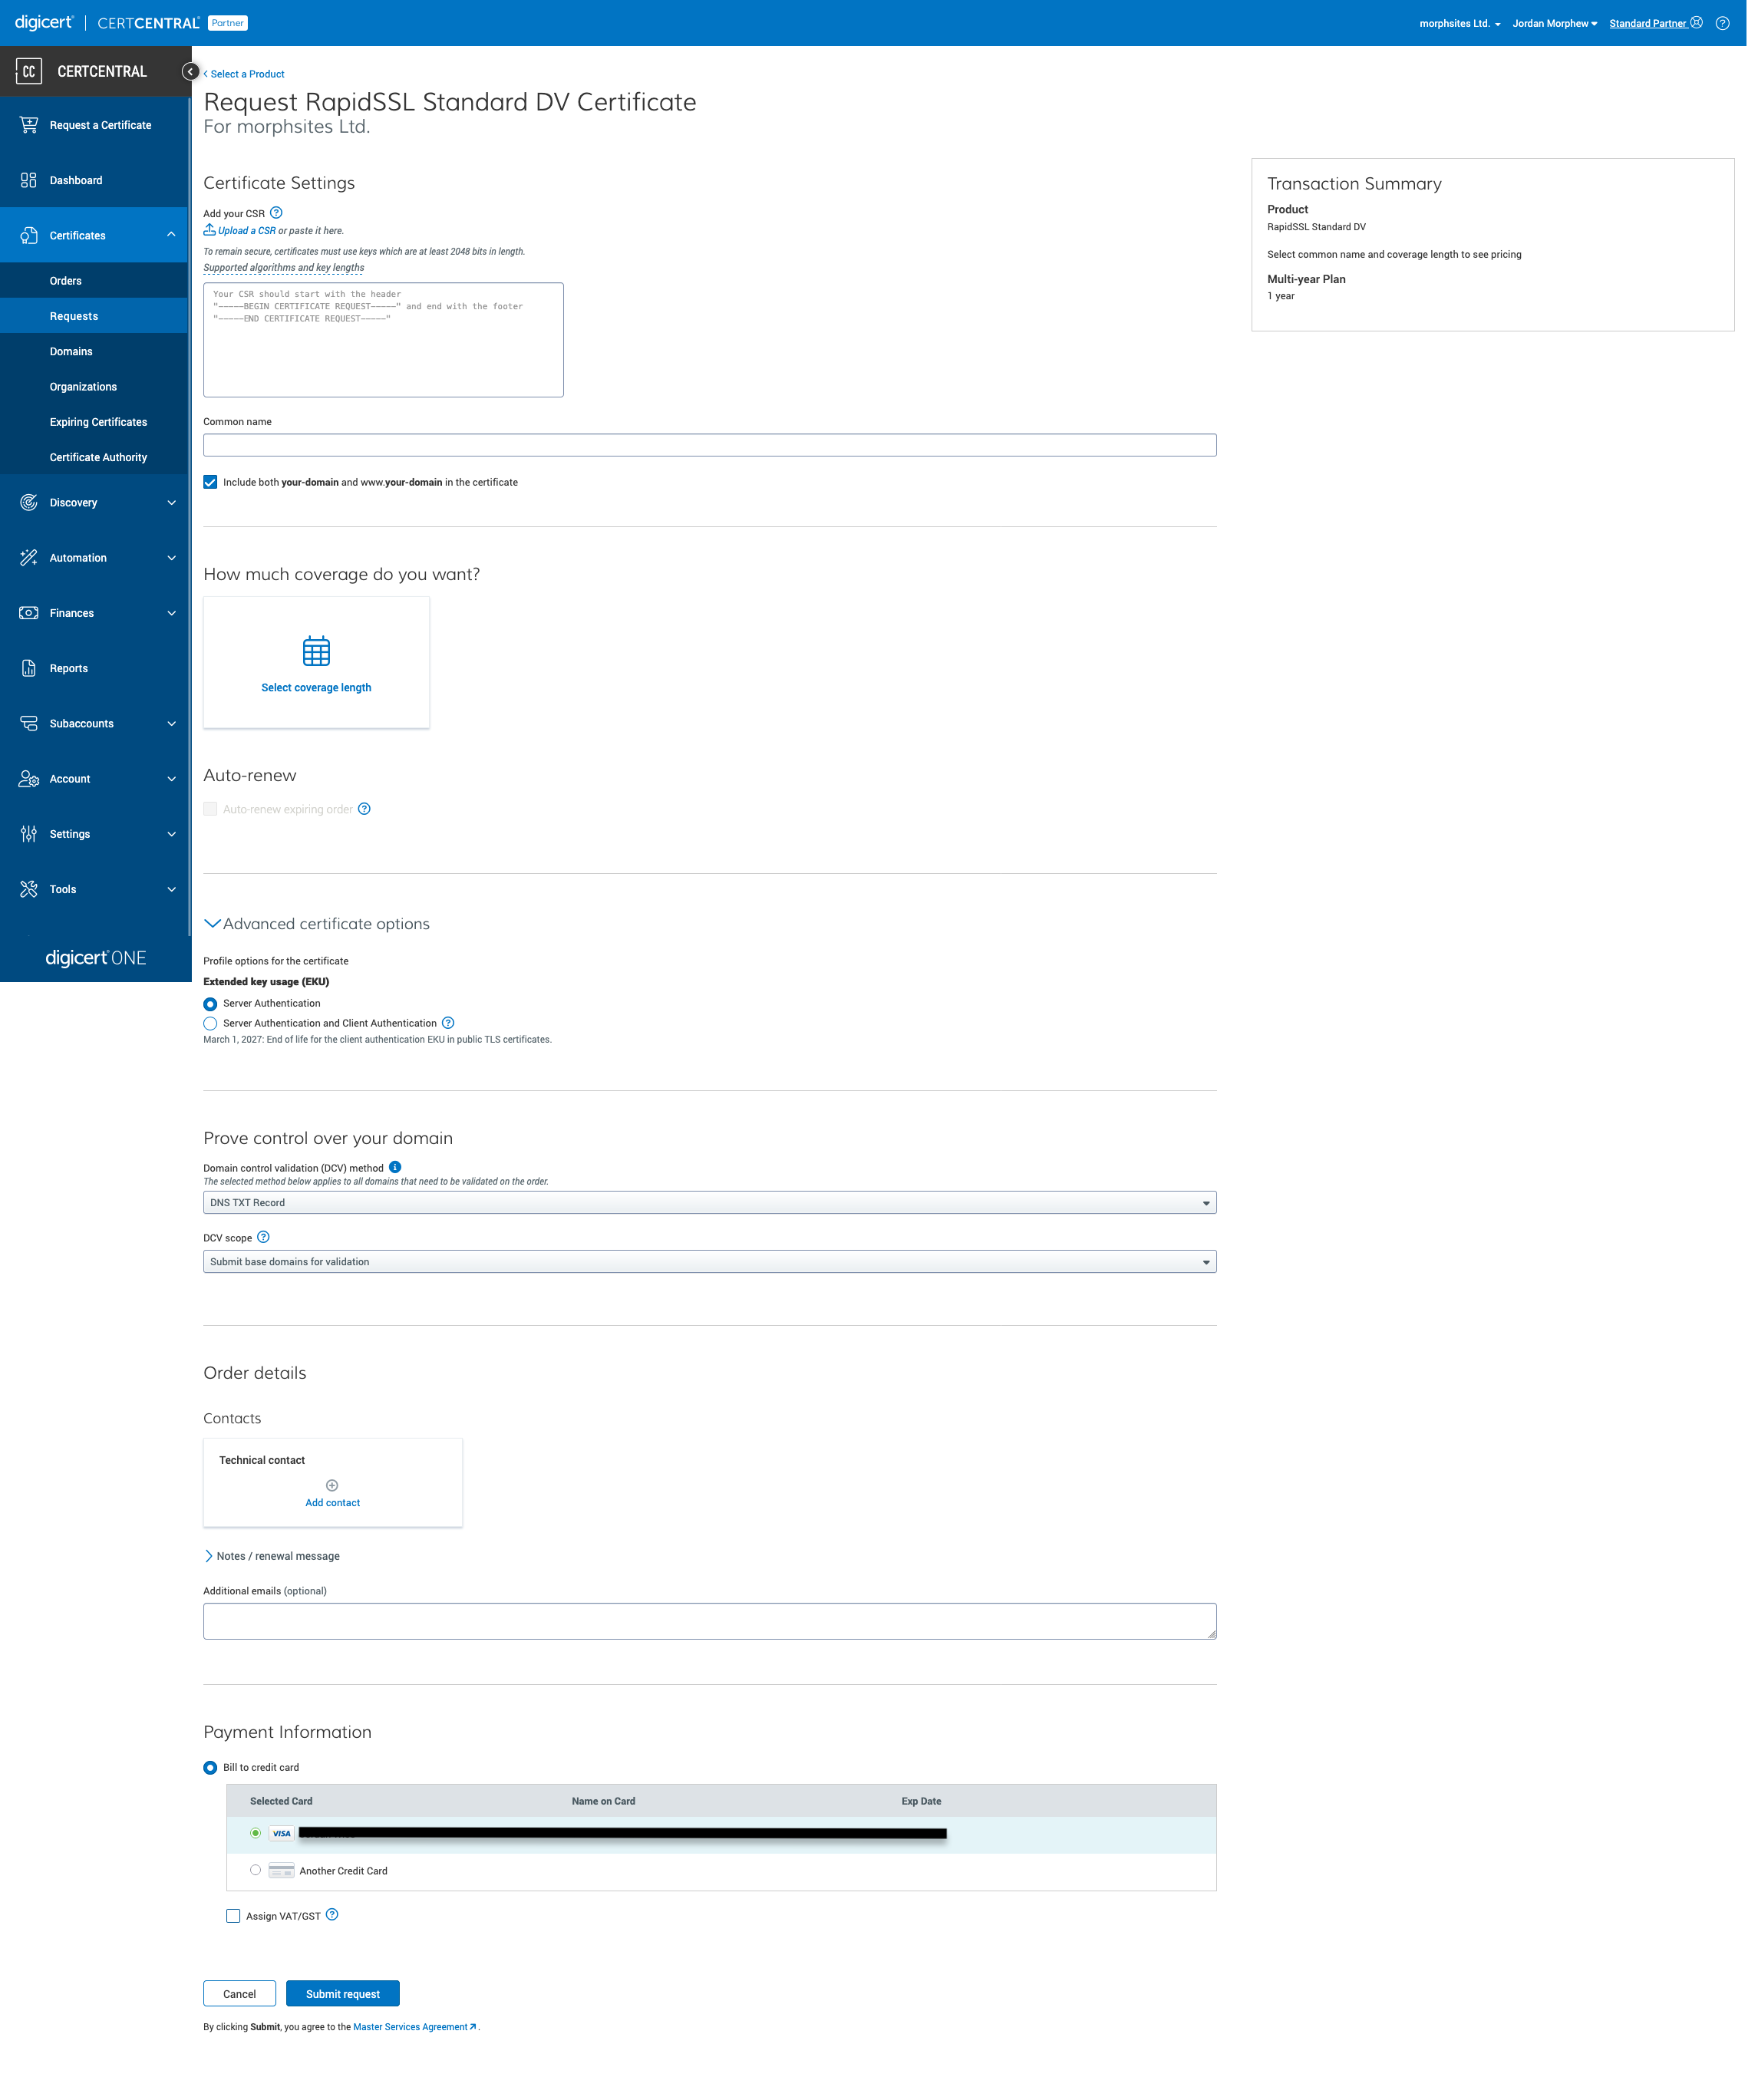
Points to adhere to during these steps
Set term: Select a validity period of 1 Year.
Crucial contact update: For all account details, physical addresses, and organizational contact information, ensure you utilize: domains@morphsites.com.
DigiCert must confirm ownership of the domain(s) listed in the CSR. We recommend the fastest route:
- Preferred method (🥇 gold standard): Use DNS TXT validation. This method is often the cleanest, fastest, and most reliable proof of ownership.
- Acceptable alternative (🥈 backup plan): If TXT validation proves problematic, utilize the HTTP File validation method.
DigiCert will provide instructions of how to apply each validation technique. Please ensure to clear up any DNS records or files on the server one validation has been completed.
Once validation is complete, proceed to finalize and payment.
❗Invoice: At this stage send the invoice to accounts@morphsites.com for billing.
Phase 3: Installation
Acquire certificate from DigiCert
- Download options: On the completed order page select Download certificate as and select more options
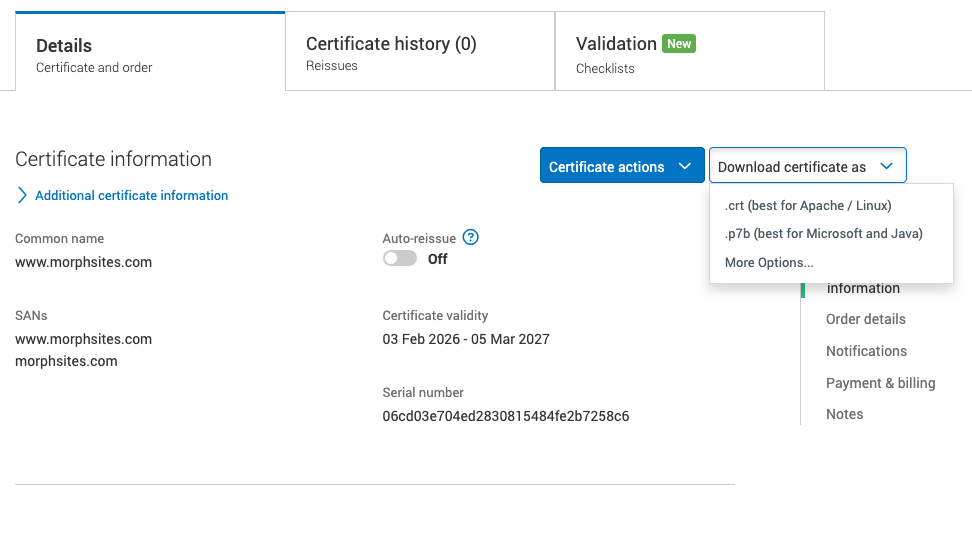
- Copy certificate: Carefully copy the certificate from the certificate colume. Include the
-----BEGIN CERTIFICATE-----and-----END CERTIFICATE-----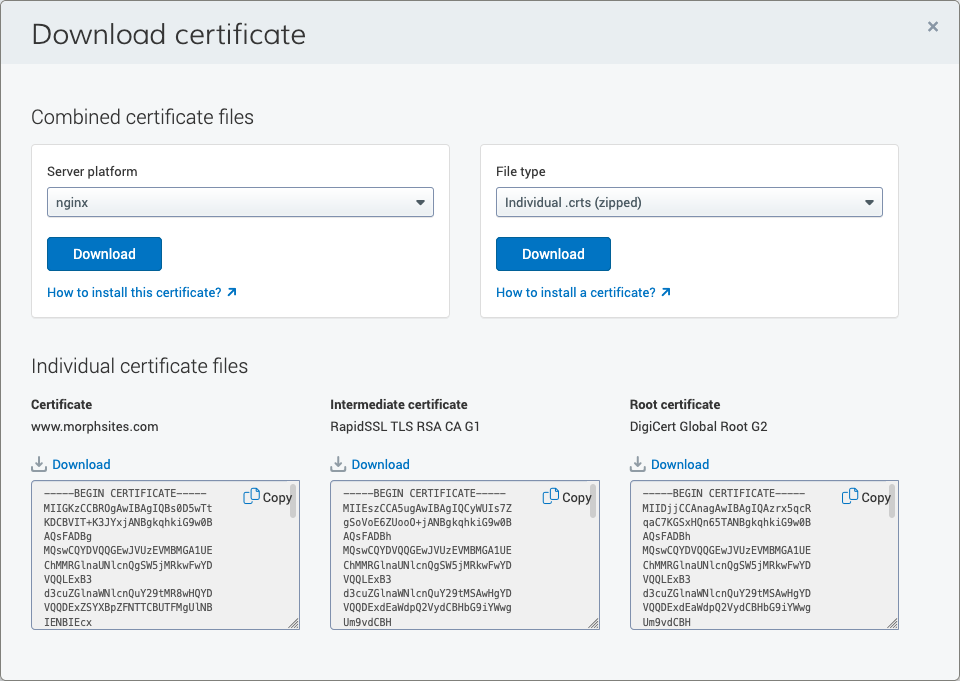
Installing via Laravel Forge
- Access domains: This can be done the same way as in Phase 1
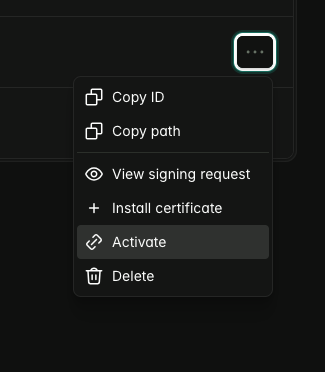
- Select install certificate
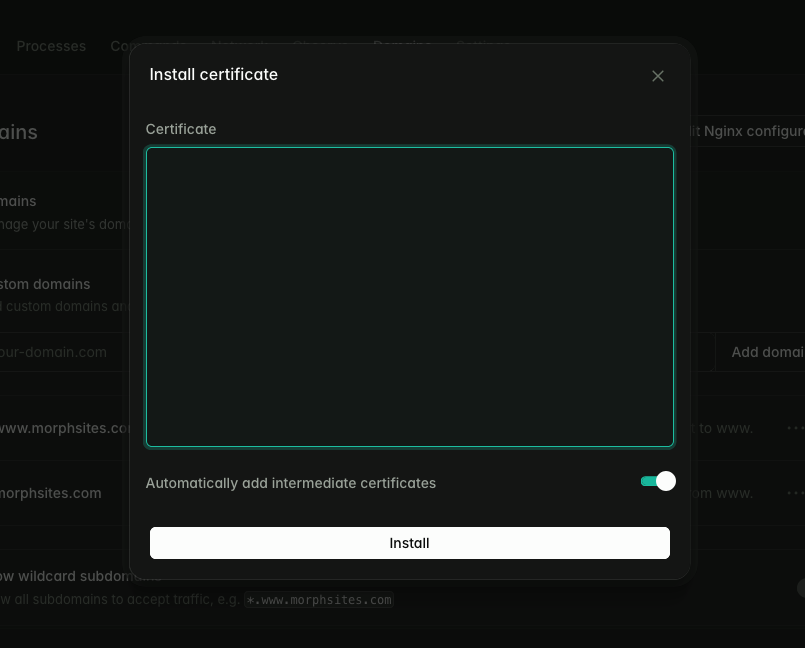
- Paste certificate contents: Paste all the contents. Keep the Automatically add intermediate certificates option selcted.
- If option not available you will need to paste the Intermididate certificated available on the Download Certificte page immediately after the certificate contents.
- Install the certificate
- Activate: Make sure to activate the certificate

Installing via CLI (CentOS instances)
- Navigate to certificate directory: On CentOS located at
/var/www/certficates - Create new version of certificate files:
- domain.crt.new
- domain.key.new
- Switch the old certificate for the new certificate: The command to run whilst replacing the
[YEAR]with the current yearmv yourdomain.crt yourdomain.crt.[YEAR] && mv yourdomain.crt.new yourdomain.crt - Switch the old private key for the new key: Run the following commaind and replace
[YEAR]with current yearmv yourdomain.key yourdomain.key.[YEAR] && mv yourdomain.key.new yourdomain.key - Test the Apache configuration: Run
apachectl configtest - Reload the Apache configuration: Run
systemctl restart httpd
Testing certificates
Test the domain against either of these sites to confirm there are no configuration issues that aren’t immediately apparent.
❗If the site is behind Cloudflare you will not be able to run these tests as the certificate you will be testing is the Cloudflare provided certificate.
⚠️ Procedure flags (internal guidance)
- Security Mandate: The private key is your single point of failure. It must be kept encrypted when the rare ocassion of sharing to a client is required. Treat it like a closely guarded secret.